
To properly define your Geodata and Simulation parameters, we recommend first inspecting your site using Google Maps or Google Earth. This helps identify key visual targets (e.g., lakes, rivers, mountains, green areas) and define the extent of terrain, buildings, and trees. We suggest limiting these areas to what is strictly necessary to avoid excessively long simulation times and large file sizes.
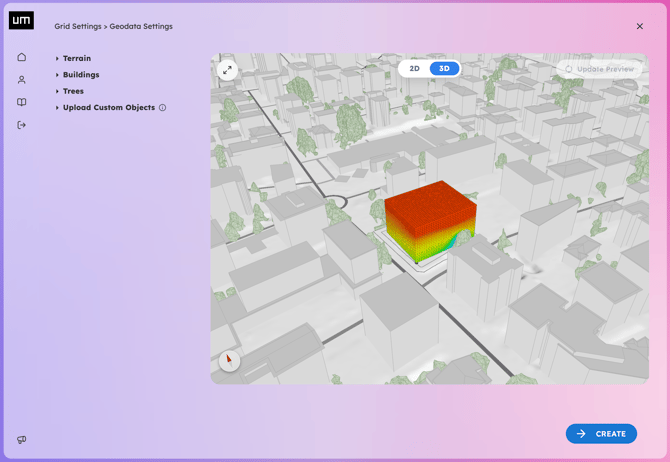
Here are some tips to refine the default parameters for better results:
-
Terrain: Increase the Intermediate Terrain length to include more surrounding buildings for obstruction or visual reference. Define the Far Terrain length to include the relevant horizon line, which is essential for accurate sunrise and sunset calculations.
-
Buildings: Toggle whether contextual Buildings are visible in the 3D scene. You can also choose to keep existing buildings inside the Analysis Area (removed by default) or convert them into analyzable Project Sketches.
-
Trees: Toggle whether contextual Trees are visible in the 3D scene, and set their distance and resolution. You can also choose to keep existing trees inside the Analysis Area (removed by default).
- Upload Custom Objects: You can upload an OBJ 3D model of your project building (Project Sketch) or customized context buildings (Custom Obstruction) in the Geodata Settings page. For more details, follow the instructions in the dedicated article: Import OBJ Files.
-
Review your settings and return to the Add Grid page. Any changes made to Geodata must be manually refreshed using the Update Preview button on the 3D scene to update the display (depending on the complexity of the datasets, your Geodata may require a few seconds to process).